Hey everyone, hope you are having an incredible day today. Today, I will show you a way to prepare a special dish, how to make shokupan | japanese sandwich bread. It is one of my favorites. For mine, I am going to make it a bit unique. This is gonna smell and look delicious.
Today I want to share with you how to make "Shokupan" fluffy Japanese white bread. "Shokupan" is one of the staple Japanese bread that you can find at any grocery store. The size is the same, but it comes in varieties of thickness. The Shokupan aka Japanese sandwich bread. What makes it different than any of those typical sandwich bread is that the recipe uses a bread roux or aka "Yukane".
How To Make Shokupan
To get started with this recipe, we have to first prepare a few components. You can have how to make shokupan | japanese sandwich bread using 11 ingredients and 17 steps. Here is how you cook it.
The ingredients needed to make How To Make Shokupan | Japanese Sandwich Bread:
- Prepare Yudane:
- Get 75 g Bread Flour,
- Prepare 125 g Boiling Water,
- Make ready Dough:
- Prepare 325 g Bread Flour,
- Get 30 g Demerara Sugar,
- Get 7 g Sea Salt,
- Make ready 6 g Active Instant Dry Yeast,
- Get 50 g Heavy Whipping Cream,
- Take 200 g Water,
- Prepare Room Temperature Softened Unsalted Butter, 25g + More For Greasing
The softest, fluffiest and most delicate loaf of white bread. Hokkaido Japanese Milk Bread - Shokupan Slice Bread Sandwich Recipe Ingredients and substitutes. Sugar - This bread is slightly sweeter than most other white bread. And yet, you can certainly reduce the sugar by half.
Instructions to make How To Make Shokupan | Japanese Sandwich Bread:
- Prepare the yudane. - - In a shallow bowl, add flour and water. - - The water has to be boiling. - - Stir to combine well.
- It should be a sticky roux. - - Spread out to cool down faster. - - Cover with a damp lint-free kitchen towel. - - Set aside to cool down to room temperature.
- Prepare the dough. - - In a large bowl, combine flour, sugar, salt and yeast well. - - Do not add the yeast directly on the salt. It will kill the yeast. - - Gradually pour the water and cream into the flour mixture while still mixing with a spatula.
- Once it becomes a dough, knead the dough inside the bowl until all the nooks and crannies of flour are kneaded into the dough, about 5 mins. - - Transfer onto a lightly floured surface. - - Add in the yudane.
- Knead for about 5 mins until the yudane is fully incorporated. - - Add in the butter. - - Continue kneading for another 3 to 5 mins. - - Do take note that the yukane and butter has to be at room temperature.
- The dough should be tacky, fluffy, smooth and it should pass the "window-pane" test. - - If the dough is too dry, add in water, 1 TBSP at a time. If the dough is too sticky, add in flour, 1 TBSP at a time. - - Lightly grease the bowl with some butter.
- Transfer the dough back to the greased bowl. - - Cover with a damp lint-free kitchen towel and let rise for 30 mins. - - It should slightly risen. - - Punch down the dough and fold the top, sides and bottom to the center. - - Flip, cover and let rise for 1 hr.
- This process is sorta to ensure that the yeast is activated. - - The dough should doubled in size. - - You can do a test by poking a floured finger into the dough. If it doesn't spring back, the yeast is activated properly and the dough is ready. - - Transfer the dough onto a lightly floured surface. - - Divide the dough into 2 equal pieces.
- Form each piece into balls. - - Cover with a lint-free kitchen towel and let rest for 15 mins. This is call the bench rest which allows the gluten to relax. - - Grease bread pan with butter.
- Pat down a dough ball to an oblong disc. - - Fold the top 2/3 way to the bottom. - - Using the heel of your palm, gently press down the sim.
- Fold the bottom 2/3 way to the top. - - Using the heel of your palm, gently press down the sim. - - Rotate 90 degrees.
- Fold the top 2/3 way to the bottom. - - Gently pinch down the sim. - - Fold the bottom 2/3 way to the top.
- Gently pinch the sim. - - Roll the dough simmed side down to form a ball.
- Transfer into the greased bread pan. - - Repeat the process for the remaining dough. - - You will have 2 dough balls, side by side in your loaf pan. - - Cover with a damp lint-free kitchen towel and let rise for 40 to 50 mins.
- Preheat oven to 200 degree celsius or 400 fahrenheit. - - The dough balls should rise about 1/2 inch away to the top of the loaf pan. - - Close the lid and wack into the oven.
- Bake for 40 to 1 hr or until the crust is golden brown. - - Remove from oven. - - Immediately unmold onto a wire cooling rack.
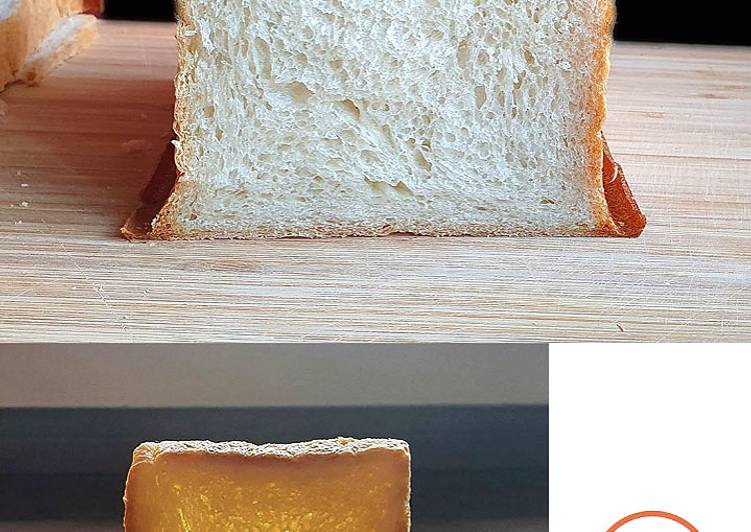
- Set aside to cool down completely before slicing. - - Use this sandwich bread for your sandwich adventures, or simply make a toast. I just simply spread my gianduja.
Sugar - This bread is slightly sweeter than most other white bread. And yet, you can certainly reduce the sugar by half. Shoku Pan is a Japanese square loaf bread that is often eaten as toast or used for sandwiches. Although rice is the biggest staple food in Japan, Shoku Pan bread today may be the most popular breakfast item. A note on size and shaping.
So that is going to wrap it up for this exceptional food how to make shokupan | japanese sandwich bread recipe. Thank you very much for reading. I’m sure you can make this at home. There’s gonna be interesting food at home recipes coming up. Don’t forget to save this page in your browser, and share it to your loved ones, friends and colleague. Thank you for reading. Go on get cooking!